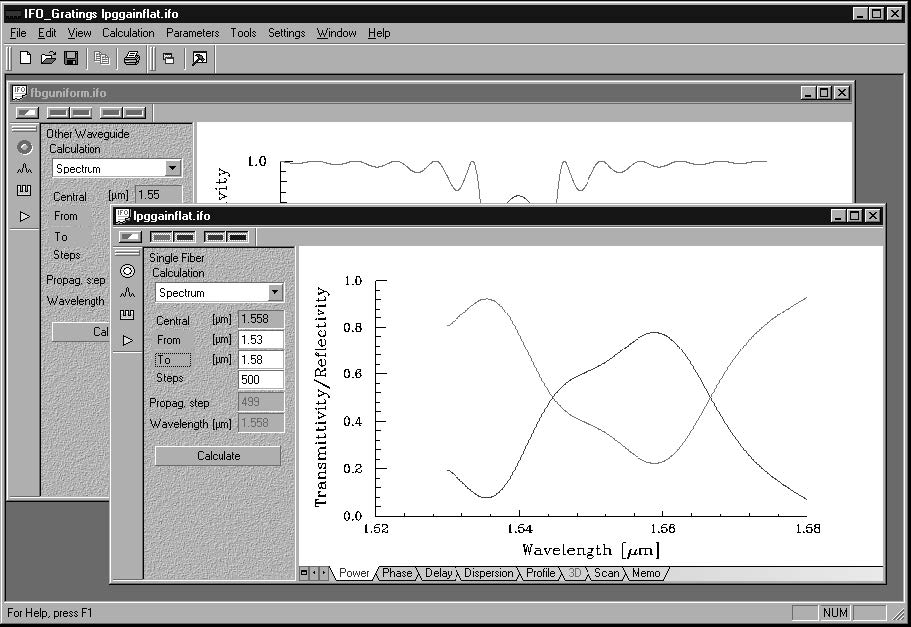
After you create a new project or open an existing one, you will see the OptiGrating
Main Window, as shown below.
The Main Window
The Main Window of OptiGrating 4.2 is a multi-document interface that allows you to open several grating projects simultaneously.
The Menu Bar displays the command and option menus that OptiGrating offers you.
The Toolbar displays the buttons you can use to speed up your work.
OptiGrating 4.2 allows you to use not only the standard buttons for working with files but also the Clone View, FWHM Tools. You will find detailed information about those
buttons in the User Guide.
The Project Window
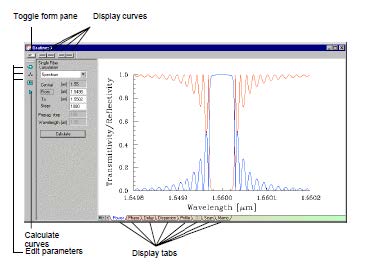
The Project Window contains the Data Entry Pane (on the left side of the window) and
the graphic display (on the right side of the window). The Data Entry Pane enables
you to select one of the calculation options, to set the range of the calculation variable,
the number of calculation steps, etc. The command buttons provide an easy access
to the most often used commands. You can control the graphic display by using the
Display tabs.
The Toggle Pane button toggles the display between the window that has a Data
Entry Pane and the Graphics window.
The Display Curves buttons turn on and off the following curves: Transmission 1, Transmission 2, Reflection 1, and Reflection 2.
The Calculation list box offers you the following options: Propagation, Spectrum, Pulse Response.
Edit Parameters consist of the following buttons (from top down): Fiber/ Waveguide parameters (edit fibers or waveguides), Mode parameters (edit list of modes), and Grating parameters (edit gratings).
The Calculate button starts numerical calculations.
The Display tabs switch the display between different characteristics.


